Enjoy the fruits of your labour – or in this case, the veggies too. Growing and harvesting your own bounty is a possibility for any keen gardener.
Gardeners all over the world have included vegetables in their endeavours, but these days the interest in planting one’s own produce has really taken off.
Even those who showed no interest are having a crack at it. The healthy eating movement has created a global curiosity about what actually goes into our food and what it takes to grow our own fresh produce.

Image credit: Unsplash
This inspired a trend that demands that fresh produce be organically grown – in other words, cultivated without poison or any chemical fertilisers. This desire for organically grown fruit and vegetables has led to home growers increasing in numbers, as truly organic produce is pricey.
Then came COVID-19, and in 2020 most of us were confined to our homes. Again, there was a notable resurgence of interest in gardening, especially growing vegetables. People discovered how rewarding it is to plant seeds and nurture a crop, eventually harvesting the fruit of their labour and feeding their families with it.
Rising food prices are another reason why planting vegetable and fruit gardens has suddenly leapt into the spotlight. It has been predicted that food security is going to become severely threatened in the future and a knowledge of how to work the land could become essential.
Advice for beginner gardeners
While enjoying the fruits of your labour is achievable for beginners to advanced gardeners, there are a few key things to know.
First of all, not every variety of vegetable will thrive just anywhere – it is very important when planning your plantings to establish how much sun the area gets (most crops need a minimum of six hours of sunlight a day).
Start small; four or five different vegetables are just enough to handle if you are a beginner grower. Only grow what you and your family enjoy, otherwise, you are wasting your time and effort.
Rising food prices are another reason why planting vegetable and fruit gardens has suddenly leapt into the spotlight.
ALSO READ:
TOP TIP: Plant tomatoes, aubergines, courgettes and sweet peppers together. They make great companions, but be sure to give the courgettes enough space to spread a bit.
Veggie season
Before planning and planting anything, make sure you are planting your chosen vegetables in the correct season.
This may sound like a silly mistake to make, but it’s an understandable one for a beginner gardener as many types of vegetables are available all year round due to greenhouse production.
If your crop is not in the luxury of a climate-controlled greenhouse, it will not survive if you plant it in the wrong season.
Tips to use trays to grow your vegetables
✣ Some vegetable seeds need to be started off in seed trays and then planted out once the seedlings have at least two sets of true leaves.
✣ Seed containers or trays are available at any nursery, as well as a wide range of biodegradable ones made of coir, but you can also use yoghurt cups, plastic trays from packing, and even egg shells. The container must just drain freely so make holes in the bottom and clean it thoroughly before use.
✣ Fill your seed containers with a light seedling mix or coco peat (ask at
your nursery).
How to plant seeds to grow your own vegetables
Step 1: Sow your seeds, two or three to a plug, at a depth that is correct for the seed. The general rule for this is that the seed must be sown at a depth of twice its diameter. Very fine seeds, like carrot or lettuce seed, should be just covered with the soil mix. Fine seeds generally require light for germination so do not cover it with too much soil.
Step 2: Make sure you label the seed containers with the variety of plants and the date they were sown.

Image credit: Unsplash
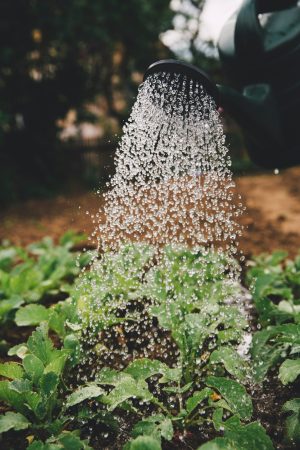
Step 3: Water the containers well with a watering can with a fine spray. Water them regularly as water is vital to the germination process, never let your newly sown seeds dry out.
Step 4: Cover your seed containers with a plastic cover will help to trap moisture and warmth inside to germinate.
Step 5: Remove these plastic covers as soon as the seeds start to germinate to avoid fungal disease and ‘damping off’. Seeds need warm soil to germinate. The ideal temperature varies between different varieties, for example, summer crops like peppers and tomatoes require warmer soil than winter crops, like cabbage or cauliflower. Heating mats for the seed trays are available at horticultural shops and nurseries and make a difference to your germination time.
Step 6: Place your seed containers in sheltered parts of your garden and water regularly.
Step 7: Start feeding your tiny seedlings with a liquid fertiliser every two weeks once they have their first set of true leaves. Note: The very first little leaves that emerge from the soil are not true leaves!
Step 8: Just before your young seedlings are due to be planted out, they must be ‘hardened off’, which means that they must gradually toughen up!
Step 9: Start by gradually cutting down the amount of water they get, without allowing them to dry out. Do this by stretching the amount of time between watering. At the same time, stop feeding them until they are planted out into the open ground.
Step 10: Gradually move your seedlings out into more sun for longer every day for five days to get them accustomed to sunlight. Fully hardened seedlings should be able to withstand a minimum of six hours of sunlight during the day.
ALSO SEE:
Feature image: Unsplash
Originally written by Pat Ingarfield and published in the August 2022 edition of SA Woman&Home Magazine.

